


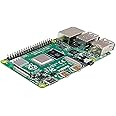
Geekworm KVM-A8 PCIe Version for Raspberry Pi 4 Model B KVM Over IP Support KVM V3 PoE ATX HDMI CSI (Unassembled and Not Include Raspberry Pi 4/SD Card/Power Adapter)
Details
- BrandGeekworm
- Model NameKVM-A8
- CPU ModelNone
- Connectivity TechnologyEthernet
- Included Components1 x X630 HDMI


Description
🚀 Take control of your workstation from anywhere—because your desk should never limit you.
- ULTIMATE COMPATIBILITY - Designed exclusively for Raspberry Pi 4 Model B (1GB to 8GB) for stable performance.
- SEAMLESS REMOTE CONTROL - Access and manage your PC from anywhere via web browser with KVM over IP.
- POWER OVER ETHERNET PO E - Simplify setup with PoE support—power and data through a single cable.
- ADVANCED SYSTEM MANAGEMENT - Remotely power on/off, reboot, configure BIOS/UEFI, and reinstall OS effortlessly.
- EFFICIENT COOLING SOLUTION - Built-in active cooling fan keeps your Raspberry Pi 4 running smoothly under load.
The Geekworm KVM-A8 PCIe kit transforms your Raspberry Pi 4 Model B into a powerful KVM over IP device, enabling full remote control of your computer via web browser. Featuring PoE power support and an onboard active cooling fan, it ensures reliable, professional-grade remote management including BIOS access and OS reinstallation. Ideal for tech-savvy professionals seeking seamless, anytime-anywhere workstation control.


Specifications
| Processor | none |
| Wireless Type | 802.11b |
| Brand | Geekworm |
| Series | KVM-A8 |
| Item model number | TB-2022-63 |
| Operating System | PiKVM V3 Platform |
| Item Weight | 2.19 ounces |
| Product Dimensions | 4.72 x 3.54 x 0.79 inches |
| Item Dimensions LxWxH | 4.72 x 3.54 x 0.79 inches |
| Number of Processors | 1 |
| Manufacturer | Geekworm |
| ASIN | B0BN1MFHMW |
| Country of Origin | China |
| Date First Available | November 21, 2022 |
Have a Question? See What Others Asked
Reviews
S**)
Remote FULL control of a computer(s) is da bomb!
Works as advertised. You'll have to use (or buy of you don't have one) a Raspberry Pi (version 4) to use this. READ the product info carefully to make sure you understand what is needed to use this as an IP KVM. If you are not familiar with using a Raspberry Pi, the do some reading (or YouTube video) research before you buy this product to make sure you understand how and know how to use this device with your Raspberry Pi. On a side note, I took the cooling fan off and am using a heat sink on the cpu. The Pi seems to work well (temp is about 10 degrees higher than using the fan) and there is no fan noise (the fan is pretty quiet anyway). Also, I am using a POE for power. I highly recommend it as there is less clutter behind the computer you have the Pi working with.
D**N
Works great. Does the job and does it well.
Worked out great for my 2U server build. The little display is a plus.I carefully crafted a piece of cardboard to cover the backside PCB so I could safely install it resting on metal. I wanted this unit because of the detached display. It works, it's in there and does the job. I had the perfect space for it in this specialized, purpose built machine. Using in production, exactly 60 days of uptime so far.When I built this I also ordered a couple of JetKVMs from Kickstarter. They just got here yesterday, now you can't even get them at all because of tariffs . I wouldn't have been able to put this machine into production 60 days ago without a KVM solution. This was available immediately and works awesome. I highly recommend building it yourself. And this is a great kit to work with. I think it took about 5 minutes to get it all ready to rock. Just watch the video before your unit arrives.Plug in a pi4 with a pikvm image, wire it up... put tailscale on it (make sure to disable key expiry) and it's ready to do the job and do it well.
K**H
Great KVM kit, just add a RPi4
I have multiple official PiKVM V3 units, both DIY and pre-assembled. But I've been always wanting something something like this: A KVM that can go directly inside a desktop/server chassis in a PCIe slot. No messy wiring cables to the outside of the chassis, everything neatly connects internally. Plus can be powered by PoE! Externally, there are only 2 cables to the unit: HDMI (in) and RJ45 (PoE). Clean!Assembly is very straightforward. Watch the video, its very good! The written assembly broshure is confusing and the text is very small. If you want to follow a written guide, make sure to follow the Geekworm wiki page. It has large photos and it's easier to see all the pinouts.However, two parts are omitted from the video:1. How to assemble and install the OLED screen. The written brochure and Geekworm's wiki page shows how to connect the OLED to the main unit. However, it still doesn't tell the user how to install the OLED onto the main unit. There are some extra unused screws in the kit, and the screw holes seem to line up with various spots on the main unit. However, it does not fit in any of those areas. I see that Geekworm has now added a disclaimer to the listing to say "use your imagination on where to mount the OLED". I used double-sided table to install it above the PCIe bracket area (see photo).2. How to enable the Realtime Clock (RTC). Both the video and the written brochure does not talk about the RTC. I reached out to Geekworm support and they responded promptly, so props to them! Turns out the only info about it is on Geekworm's wiki page. First, you need to install a 3V C1220 battery. It is not included with the kit. Then edit the "/boot/config.txt" file to change the clock chip from "pcf8563" to "ds1307". Reboot, then software-enable the RTC via "hwclock -w". Check via "hwclock -r".Both the above are not a big deal, IF you read the Geekworm wiki page. However the one below loses a star:(-1 star): There is an ATX harness (ATX Control Cable) included, which makes it easy to connect the KVM unit to the motherboard. However, there is no harness provided to connect the KVM unit to the case pins. The pinout is not silk-screened to the PCB, and the text is very small on the brochure. The pins are inset on the connector on the unit, which makes it difficult and frustrating to connect. Finally, in my 4U server case, the case ATX wire was barely long enough to reach all the way back of the case where the KVM unit is installed. All of this could've been solved by a simple ATX harness (like one that is already included), that would've made the installation so much easier!Overall, I think this is a great KVM unit. It's a little pricey at $100, so when including a RPi4, it comes out to $150 or so. However, this is still cheaper than the official PiKVM V3 HAT or the pre-assembled kit at $250+. I will be buying more units, and I hope they make a PiKVM V4 version in the future.
T**F
Great way to add PiKVM to your rig without all the wires
You need your own Pi 4. Just wanted to make that clear.This arrived quickly (within a few days) without the long wait typical of this type of niche equipment. I followed the directions carefully and was successful in assembling the final product. You will need a C1220 battery if you want to use the RTC function.I had to refer to GeekWorm's wiki very closely to get the ATX pinouts correct for the case buttons/LEDs. I eventually noticed the positive / negative information silkscreened on the PCB, but on the opposite side. These are a little tricky to stay attached. I wish that Geekwork had provided another ATX connector for the case side and then connectors to attach the case wires to. I would recommend that you do the case wires last after everything else is installed, cables routed/mounted and then put the individual case ATX wires into the card.Also, the choice of PiKVM image is important if you want the small OLED to work. Download the Raspberry Pi 4, v3 Hat version. I had flashed a different version and had to do it again.Once it was up and running, I connected the OLED and it works well. I'm not sure what to do with it now because it doesn't have a case that came with it. I'm looking on the web for cases I could print on my 3D printer, but seems like this should be included. As it stands, it is on top of the computer case in its little clamshell shipping box.I noted errors in the system log about every 5 seconds about a kvmd-watchdog timer. I dig some sleuthing and eventually found a command that disables the timer. Looks like there is an incompatibility with the PiKVM image and the geek worm hardware. Using the command below fixed the error message:systemctl disable --now kvmd-watchdogAll is good. I'm able to remotely log in, administer the box including BIOS work from the comfort of my living room chair on a laptop. All of the extra wires are inside my computer case, with the only additional wires being power, ethernet and an HDMI jumper cable from the "card" to the HDMI output of the computer. I am happy.
Common Questions
Trustpilot
5 days ago
2 weeks ago
